Now this is a little surprise, a sneaky little goblin shaman sneaking into the latest set of GW releases. Very sneaky indeed! As I am in the middle of painting up some goblins it caught my attention over on the Warhammer Forum (originally posted on Warseer).
It's a nice enough figure for sure, well proportioned hands on a plastic goblin is a welcome improvement. It's a nice pose too, a bit more considered than the usual manic waving of staff in the air. The head/face is a little underwhelming, not that different to any of the rank and file. For me, it's a candidate for an army standard bearer rather than a shaman, reasonable conversion fodder. A boxed regiment of this style of goblin would have been very exciting about a year ago, when the new army book was released.
Will I buy it? Probably not. I tend to use night goblin shamans for mushroom shenanigans and already have 2 or 3 of those in my army. Similarly I don't need an army standard bearer as I already have one. Maybe I might buy one to paint up just for the fun of it! I can decide in a couple of weeks' time.
Thursday, 24 May 2012
Monday, 14 May 2012
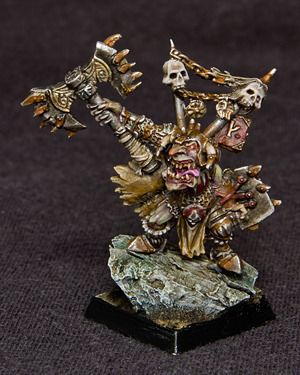
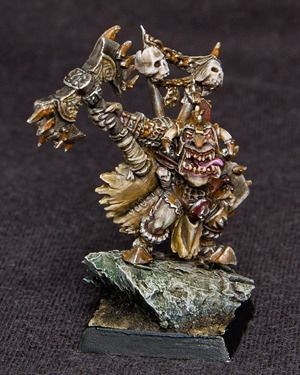
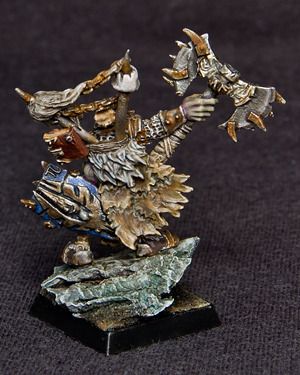
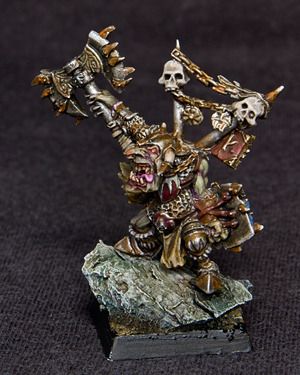
Goblin Warlord painted
Sunday, 13 May 2012
Painting a Goblin Warlord
Stage 1 : Preparation
In this first picture the model has been cleaned and assembled and glued to a piece of cork, very handy for simple rocks on bases. I primed it with Halfords white car primer (a UK brand). When the primer was fully dry (check the can for drying times), I applied a thinned wash of a dark brown all over the model, so that I can see the detail better. It looks more like grey on this shot, it doesn't matter that much, it's just a guide for where to put the subsequent layers of paint. Finally for the prep stage, I glued some sand on the base.
Stage 2 : Basic colours
The least inspiring phase of any painting. It's just a question of applying your chosen colours as carefully and neatly as possible. The wash from the first stage should be a help here, acting as guide lines. The picture shows the basic palette I have used. It's pretty muted, that's the way I like my figures, and I can always add some spot colour later on if I really want to. Note also that the figure is attached to a cotton reel using some white tac. This makes it much easier to hold.
Stage 3 : Shading
In this stage I shaded nearly all the basic colours. In the past I have used GW washes for this, or a mix of Tamiya and inks. These days I tend to use matte medium (available in any art supplies shop). I just mix it up with my chosen colour and apply it thinly, concentrating on the deeper recesses and/or areas I want to be dark. It should "rest" in these areas quite nicely. If it flows all over the surface, like a glaze, you need to add more medium. If it's very gloopy and sticks to your brush, you need to add a little water. I am pretty sure that this is how GW washes are made, paint and medium, it's much cheaper and more flexible to make your own.
In this stage I have also painted the rock. It started a light grey (see previous picture), I stippled on a few areas of browns and greens to add a little texture. Then I simply drybrushed the raise areas of the cork, making it lighter on the sharper edges. Finally I toned it all down a little with a brown wash, which was also applied to the sand.
Stage 4: More Shading, Some Details
In this stage there's more shading done, some with simple GW washes such as the gold areas on the axe (that's gryphone sepia over the chainmail). I have also shaded the skin more deeply with a purple glaze (not to be confused with the classic Jimi Hendrix song). It looks a bit much in this shot but will be toned down in the next stage. There are some highlights on the cloth areas, difficult to see in this pretty poor snap.
Stage 5 : Finishing Touches
More highlighting and shading as required in this step, mostly refining the skin and other prominent areas. Much of the work was done on the back of the model which you can't actually see in this photo! Not to worry, it's not been a full step by step article, more a general overview of my workflow.
The colour balance in the pictures is poor, I am using a pocket camera and the light from the window. I will get some better photos posted in the next few days.
Monday, 7 May 2012
Goblins WIP
It's the May Day bank holiday in the UK and so predictably it's cold and rainy and feeling more like February. The perfect excuse to avoid any gardening and stay wrapped up nice and warm inside, just a pair of cutters, a sharp knife and some plastic glue to keep up the spirits. And lots of little gobliny bits.
I want my goblins to look a bit sneaky of course, but also a downtrodden, vicious-if-cornered mob. Here's a sneak peak of progress to date, I have most of this unit of forty goblins constructed now. I have also built a general and his bodyguard, to be speed painted next weekend. Waaaargh!
Saturday, 5 May 2012
Feeling Green
Theoretically I should have turned to the Vampire Counts. It doesn't matter if I have to remove handfuls of zombies and skeletons each turn, because a) they will probably come back to life in the magic phase and b) they are already dead! I flicked through the army book a couple of times, but the old magic that it used to have for me, just seems to have drained away. For the time being at least.
In the end I turned to the army that I had originally started to build purely because I had a few models from the Battle for Skull Pass set. The Orcs and Goblins were always intended as a "spare" army, to be collected cheaply from ebay and to give me an opponent for my Dwarfs. Somehow they have slowly evolved into my biggest army, there are about 2000 points painted with at least that much again in boxes waiting for assembly/paint. Whenever I play them, I don't mind if I lose them in droves and I generally have fun, especially since the new book removed the frustration of the old animosity rule (there's still animosity of course, but it's not as likely to completely cripple your battle plan like the old system did).
Reading the army book I was drawn to the sneaky side, the filthy little goblinses. I need to boost my night goblin regiment a little, from 30 to about 40. And I also should really finish the Goblin Gizmos I started around this time last year. But in true hobbyist fashion, I decided to start a completely new regiment. One thing led to another and the whole thing has ballooned into an idea for an all goblin army. More details in the next few posts.
Wednesday, 2 May 2012
Dwarf Engineer painted
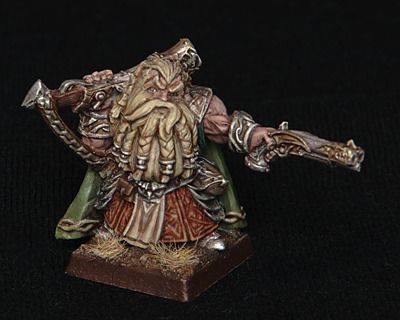
I finished the Dwarf Engineer. I am quite happy with the metals and the leather apron, but there are a few niggling problems with the rest of it. The cloth bits are a bit glossy and no matter how much matte varnish I use it seems to make no difference. The hair is blonder than I wanted, I had it a nice pale colour but then glazed it with too much yellow. The skin is okay, but I had a lot of problems with the eyes, which were virtually non-existent on the model. In fact, the quality of the cast overall was quite low, with a few areas miscast and the model in general being "soft" on detail. I hope Avatars of War eventually make the move to resin, as long as it's not finecast resin. Blimey, all this exposure to the dwarf has turned me into an old grumbler!
Subscribe to:
Posts (Atom)